1、功能介绍
创建新的运费模版和修改运费模版,例如可以单独设置广东的收单运费和续费运费。可以单独设置某个省份包邮
2、操作路径
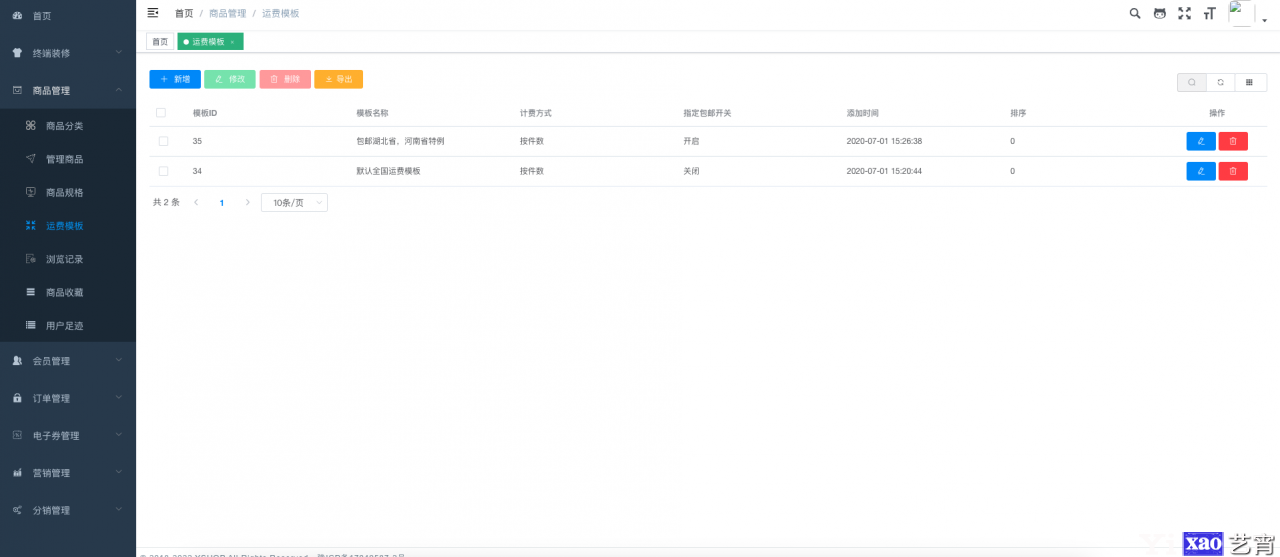

新增
修改
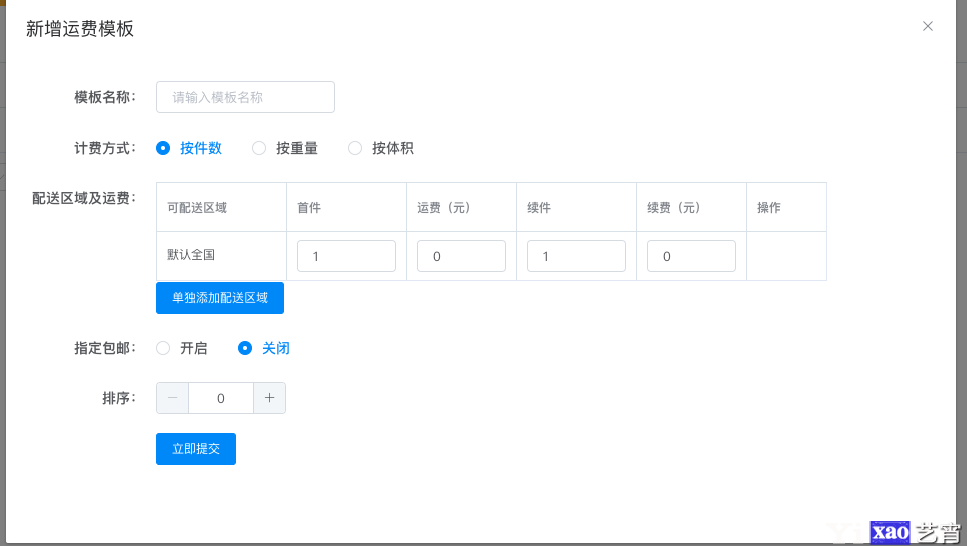
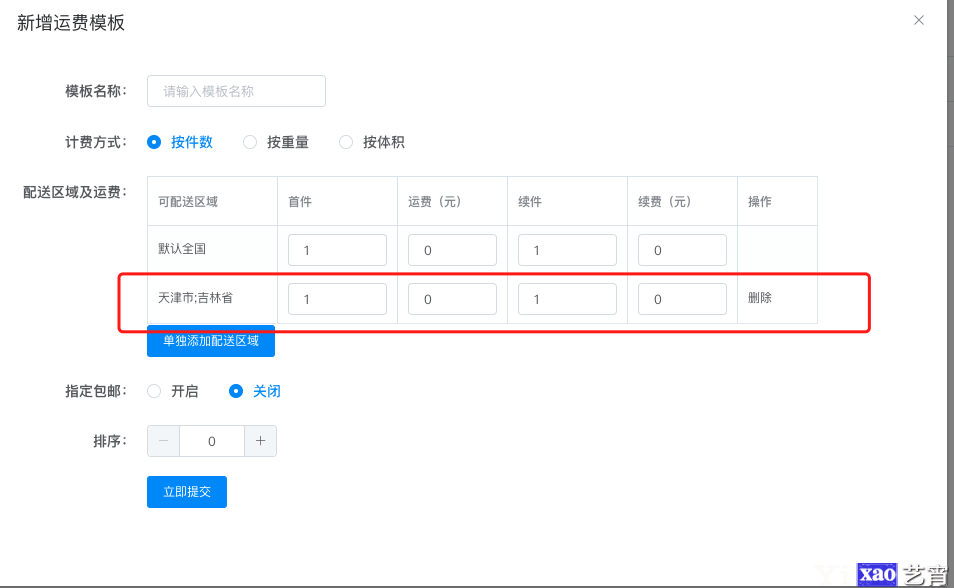
3、新增前端界面
如下代码片段,计费方式,使用单选框组件
<el-form-item label="计费方式:" props="state" >
  <el-radio-group class="radio" v-model="formData.type" >
    <el-radio :label="1">按件数</el-radio>
    <el-radio :label="2">按重量</el-radio>
    <el-radio :label="3">按体积</el-radio>
  </el-radio-group>
</el-form-item>
实现效果如下截图

如下是配送区域及运费代码

上述是实现效果图
<el-row :gutter="24" type="flex">
  <el-col :xl="24" :lg="24" :md="24" :sm="24" :xs="24">
    <el-form-item class="label" label="配送区域及运费:" props="state">
      <el-table
        ref="table"
        :data="templateList"
        empty-text="暂无数据"
        border
      >
        <el-table-column prop="regionName" label="可配送区域" width="130" />
        <el-table-column prop="first" label="首件" width="120">
          <template slot="header" slot-scope="scope">
            <span v-if="formData.type == 1">首件</span>
            <span v-else-if="formData.type == 2">首件重量(KG)</span>
            <span v-else>首件体积(m³)</span>
          </template>
          <template slot-scope="scope">
            <span><el-input type="text" v-model="scope.row.first" /></span>
          </template>
        </el-table-column>
        <el-table-column prop="price" label="运费(元)" width="110">
          <template slot-scope="scope">
            <span><el-input type="text" v-model="scope.row.price"/></span>
          </template>
        </el-table-column>
        <el-table-column prop="_continue" label="续件" width="120">
          <template slot="header" slot-scope="scope">
            <span v-if="formData.type == 1">续件</span>
            <span v-else-if="formData.type == 2">续件重量(KG)</span>
            <span v-else>续件体积(m³)</span>
          </template>
          <template slot-scope="scope">
            <span><el-input type="text" v-model="scope.row._continue"/></span>
          </template>
        </el-table-column>
        <el-table-column prop="continue_price" label="续费(元)" width="110">
          <template slot-scope="scope">
            <span><el-input type="text" v-model="scope.row.continue_price"/></span>
          </template>
        </el-table-column>
        <el-table-column  label="操作">
          <template slot-scope="scope">
            <a v-if="scope.row.regionName!==\'默认全国\'" @click="delCity(index,1)">删除</a>
          </template>
        </el-table-column>

      </el-table>
      <el-row type="flex" class="addTop">
        <el-col>
          <el-button type="primary" icon="md-add" @click="addCity(1)">单独添加配送区域</el-button>
        </el-col>
      </el-row>
    </el-form-item>
  </el-col>
</el-row>
如上述第1行代码,使用el-row进行页面布局
如上述第2行代码,使用el-col ,占一列
如上述第3行代码,使用el-form表单标签,下面对内容都是表单反问
如上述第4行代码,使用table表格。
如上述第18,23,33,38行代码,在el-table-column里面使用输入框,对应表示设置值,首件,运费(元),续件,续费(元),使用意思是满足购买多少件的运费,第二次续多少件,续费是多少。
分别对应的变量是scope.row.first,scope.row.price,scope.row._continue,scope.row.continue_price。row是一个数组。可以听看见多行
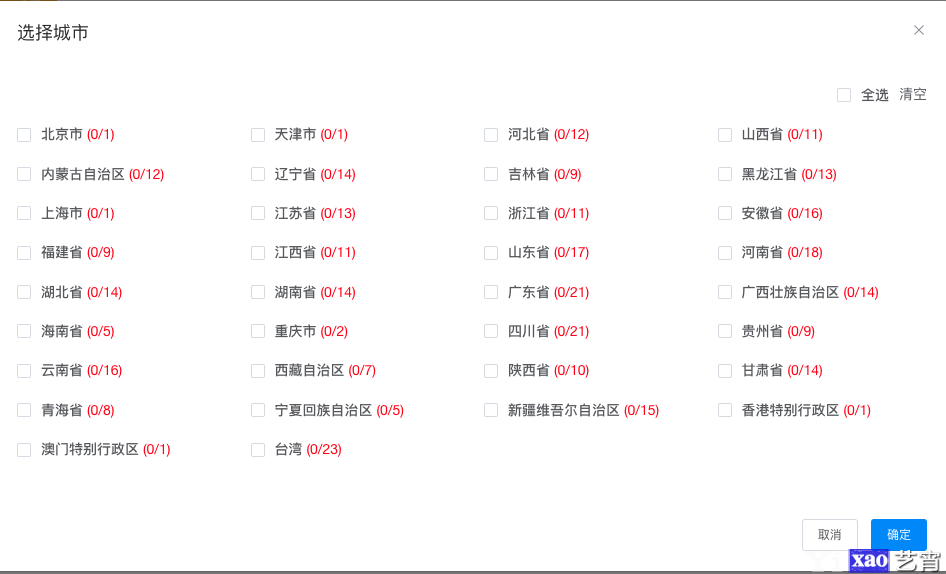
如上述第50行代码,绑定addCity事件,点击执行的效果是:
实现代码
import city from \'./city\';
components: {crudOperation, rrOperation, udOperation, MaterialList, city},
// 单独添加配送区域
addCity (type) {
  this.$refs.city.addressView = true;
  this.type = type;
  this.$refs.city.getCityList()
},
如上述第7行代码,打开组件city,如下是city的代码路径
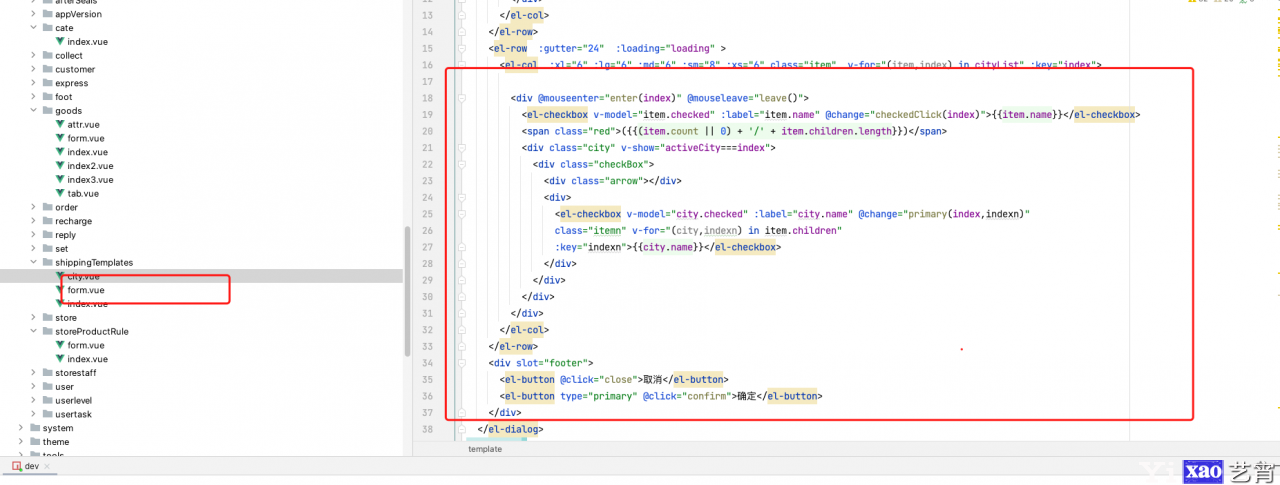
// 确定;confirm () { let that = this; // 被选中的省市; let selectList = []; console.log("city:" that.cityList[0].children) that.cityList.forEach(function (item, key) { let data = {}; if (item.checked) { data = { name: item.name, city_id: item.city_id, children: [] }; } console.log("data:" data) that.cityList[key].children.forEach(function (i, k) { if (i.checked) { data.children.push({ city_id: i.city_id }) } }); if (data.city_id !== undefined) { selectList.push(data); } }); console.log(selectList); if (selectList.length === 0) { return this.$message({ message:\'至少选择一个省份或者城市\', type: \'error\' }); } else { this.$emit(\'selectCity\', selectList, this.type); that.addressView = false; this.cityList = [] }},如上代码是选择省份后绑定的点击事件
如上述36行代码,执行父级组件selectCity,并将选择好的省份数据(selectList)回传给父级函数。
如下是父级selectCity事件函数
selectCity: function (data, type) {
let cityName = data.map(function (item) {
return item.name;
}).join(\';\');
switch (type) {
case 1:
this.templateList.push({
region: data,
regionName: cityName,
first: 1,
price: 0,
_continue: 1,
continue_price: 0
});
break;
case 2:
this.appointList.push({
place: data,
placeName: cityName,
a_num: 0,
a_price: 0
});
break;
}
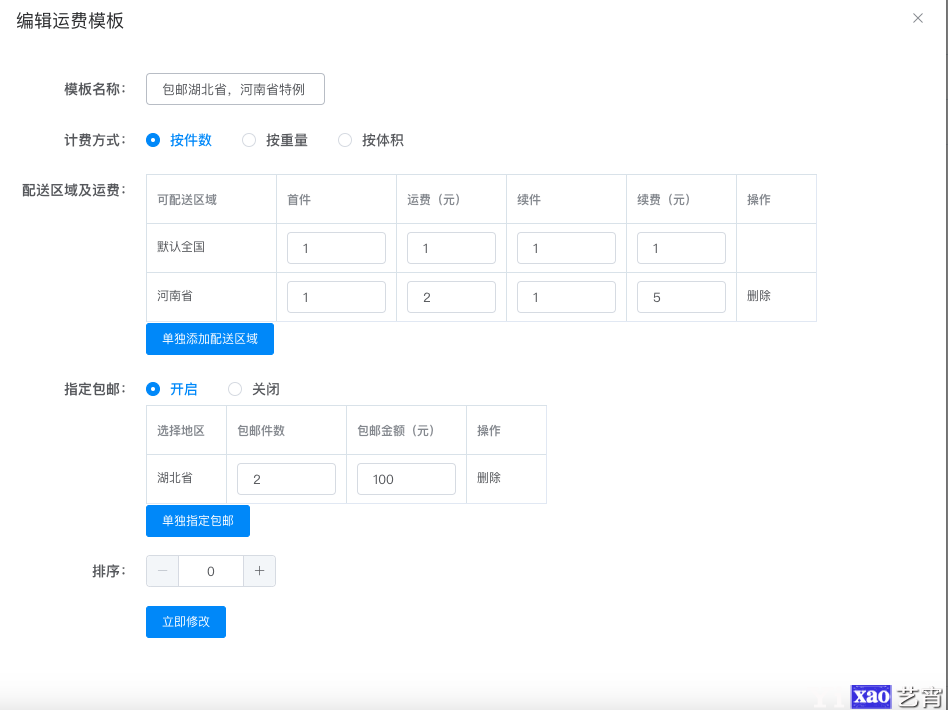
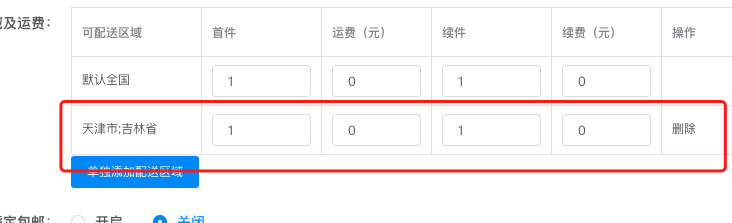
},如上述第7行代码,表格的data增加一个行数据,那么对应运费表格就添加一行
效果如下:
填写完上面的信息,点击提交,提交代码如下:
let data = {
  appoint_info: that.appointList,
  region_info: that.templateList,
  sort: that.formData.sort,
  type: that.formData.type,
  name: that.formData.name,
  appoint: that.formData.appoint_check
};
crudYxShippingTemplates.add(data,that.id).then(() => {
  if(that.id){
    this.crud.status.edit = CRUD.STATUS.NORMAL
    this.crud.editSuccessNotify()
  }else{
    this.crud.status.add = CRUD.STATUS.NORMAL
    this.crud.addSuccessNotify()
  }

  this.crud.resetForm()
  this.crud.toQuery()

  this.formData = {
    type: 1,
    sort: 0,
    name: \'\',
    appoint_check: 0
  };
  this.appointList = [];
  this.addressView = false;
  this.templateList = [
    {
      region: [
        {
          name: \'默认全国\',
          city_id: 0
        }
      ],
      regionName: \'默认全国\',
      first: 1,
      price: 0,
      continue: 1,
      continue_price: 0
    }
  ];
});
如上述第一行代码,设置请求后台的数据,数据格式是json
如上述第9行代码,
crudYxShippingTemplates.add 调用后台javaapi接口,添加运费模板
4、API接口代码
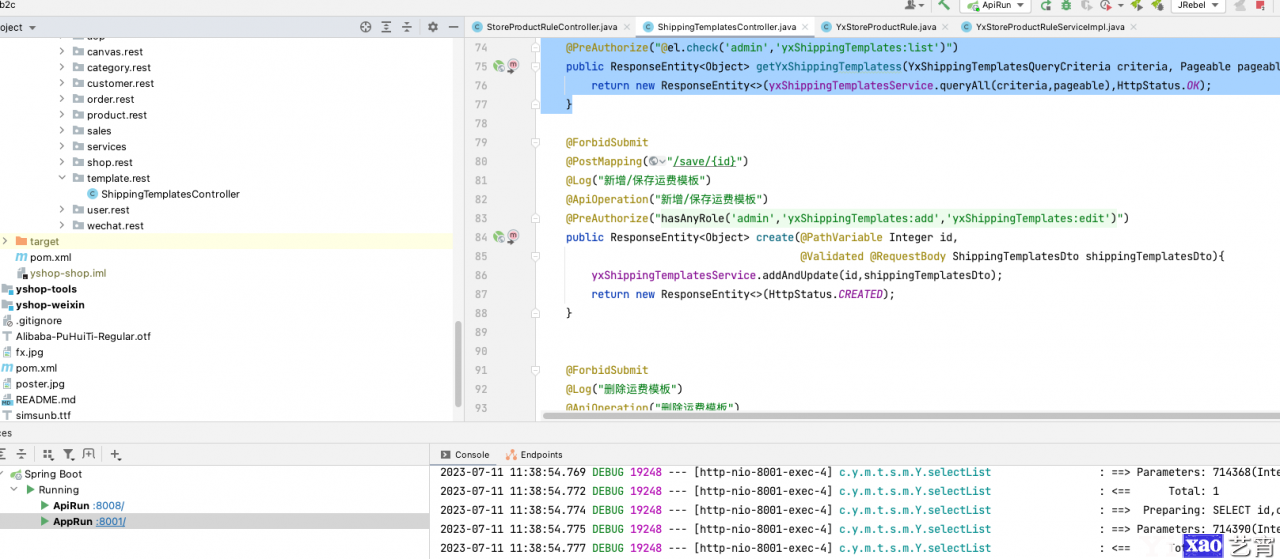
@ForbidSubmit@PostMapping("/save/{id}")@Log("新增/保存运费模板")@ApiOperation("新增/保存运费模板")@PreAuthorize("hasAnyRole(\'admin\',\'yxShippingTemplates:add\',\'yxShippingTemplates:edit\')")public ResponseEntity
内容出处:,
声明:本网站所收集的部分公开资料来源于互联网,转载的目的在于传递更多信息及用于网络分享,并不代表本站赞同其观点和对其真实性负责,也不构成任何其他建议。如果您发现网站上有侵犯您的知识产权的作品,请与我们取得联系,我们会及时修改或删除。文章链接:http://www.yixao.com/procedure/30678.html
 微信扫一扫
微信扫一扫
 支付宝扫一扫
相关推荐
-
Spring Boot + Vue 如此强大?竟然可以开发基于 C/S 架构的应用
前言 虽然 B/S 是目前开发的主流,但是 C/S 仍然有很大的市场需求。受限于浏览器的沙盒限制,网页应用无法满足某些场景下的使用需求,而桌面应用可以读写本地文件、调用更多系统资源…
-
用Python写了一个疫苗信息管理系统
Tkinter对于那些只是临时使用,需要快速开发出一个满足基本需求的轻型应用的用户来说,还是非常香的,相关组件也是相当完整的,看到这里估计肯定有人想说pyside2和pyqt5,嗯~~,它俩也挺好的。
-
Reactive Spring,响应式MySql交互
Spring Data R2DBC项目是Spring提供的数据库响应式编程框架。 R2DBC是Reactive Relational Database Connectivity的首字母缩写词。
-
php给app 或前端封装api 接口——json格式
封装api 返回数据结构 封装统一结构的出口如下图:(定义好一般不要去变动) code :返回状态码,可逻辑出数据字典。如200:成功,-201:用户不存在、-202:密码错误、-…
-
Vue最简单的登录验证码功能实现
在登录界面中我们经常会遇到需要校验验证码才能登录,验证码是由一串随机产生的字母、数字或符号组成。目的是为了防止用户利用机器人自动注册、恶意登录、刷票灌水等操作,验证码技术可以适当的…
-
一款vue编写的功能强大的swagger-ui,有点秀(附开源地址)
swagger-ui有非常多的版本,觉得不太好用,用postman,每个接口都要自己进行录入。所以在基于think-vuele进行了swagger格式json的解析,自己实现了一套…
-
springboot+thymeleaf+nginx实现页面静态化
适用场景 在高并发的情况下,为了缓解服务器动态解析的压力,利用nginx处理静态文件的优点,可将系统中修改次数较少的页面进行静态化处理。 自定义工具类 import org.thy…
-
python快速开发一个MP3播放器示例
全部代码如上已经贴到图片 安装开发依赖 上述软件只需要两个python包 pip install python-vlc -i https://pypi.douban.com/sim…
-
去除discuz中discuz.gtimg.cn/cloud/scripts/discuz_tips.js代码最完美方法,不影响伪静态
最近一直在用discuz二次开发一个新项目,发现模版 footer.htm 里面是用 调用的一段代码一直拖慢页面,还会影响部份js的效果,有网页去除方法是在模版底部去掉 代码,但…
-
umi提速方案MFSU
最近在开发react项目,在npm start启动项目的时候,速度很慢,影响工作效率。并提示尝试新出的 MFSU 方案: antd pro v5 项目里已经使用了MFSU案例。an…